• Stacks Image 6

    Caption Text

    Link
  • Stacks Image 7

    Caption Text

    Link

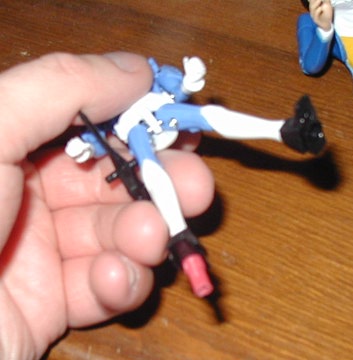
How to make pegs for the Ultarama™ Action Figure Display
Note 2014 - Unfortunatly Ultraramas are no longer for sale

Stacks Image 449
One of the great features of Ultarama™ is that you can add your own backgrounds. Here are the measurements for the back of the Ultarama™, and then below is instructions how to make pegs for your Microman / Micronaut figures.


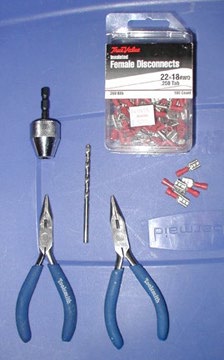
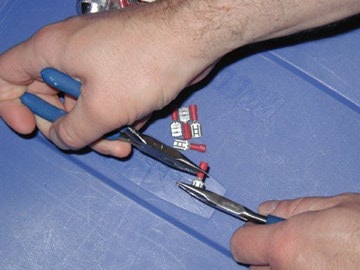
First you will need the following materials

(2) Pliers

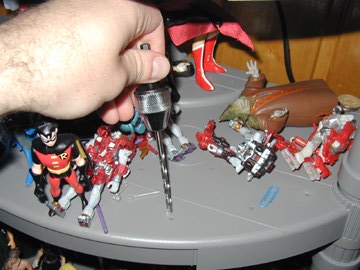
(1) Drill Bit size 11/64

(1) Drill Bit Chuck (for hand drilling)

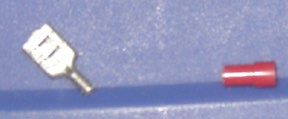
(1) Box of 100 Electrical Female Disconnects 22-18 AWG .250 tab

Also Recommended (Electric Screwdriver that you can plug the Drill Bit Chuck into)
Stacks Image 454
First you will need to separate the Electrical Disconnect. Take one pliers and place it on each end. Slowly twist until the metal tip separates from the plastic.
Stacks Image 463
Here are the two parts separated
Stacks Image 460
Now taking the 11/64 drill bit and the drill bit chuck, you will need to drill out the peg holes in the Ultarama™ playset. You will be inserting the plastic tip of the female disconnects in these holes.
Stacks Image 457
I like to insert the wider end into the figure's foot now. The wide end of the Female Disconnect is 5mm
Stacks Image 466
Now Microman can hang out with his other friends.
Stacks Image 469
The Micro E R It is six Ultarama stories tall. To the right are my two Bob Bases and the Build Base